Uploading Contacts via Spreadsheet
The contact import enables you to create and enhance your Levitate contacts in bulk. This article overviews the key concepts and steps to build out your Levitate contacts. The import supports CSV, XLS, XLSX file-types.
How does the Contact Uploader work?
Craft your client spreadsheet where each row represents a particular client, starting with their email address. Fill the cells to the right of the email address with the information you wish to populate in Levitate.
Example

Import the spreadsheet and select the Levitate field that aligns with each column
See below for a step-by-step walk-through:
What information can be included?
Below is a list of headers that you can use to categorize your columns. (*required fields)
The Basics
- E-mail Address
- First Name*
- Last Name*
- Birthday
- Tags
- Key Facts
*A First Name and Last Name must be included in order for the spreadsheet to upload
Note: Birthday dates are accepted in most common formats (for example, January 15, 1985, 1/15/1985, or 01-15-1985). If a birthday value cannot be parsed as a valid date, that field is silently skipped for that contact and the rest of the import continues normally. However, if the year portion of a birthday date is in the future (for example, a typo such as 1/1/2204), the importer treats the entire file as invalid and stops processing — no further rows are imported. Review all birthday dates before uploading to avoid this.
Removing Information via Spreadsheet
- Remove Tag— this will remove the listed tag from the contact
- Company Remove Tags— this will remove the listed tag from the company
Phone Numbers
- Phone Number
- Home Phone
- Mobile Phone— we will prioritize trying to text number listed as 'Mobile,' but if not available, we'll try through other numbers
- Work Phone
- Other Phone
- Fax
Company Level Info
- Company
- Company City
- Company Country
- Company Identifier
- Company Key Facts
- Company LinkedIn URL
- Company Phone (Mobile)
- Company Phone (Other)
- Company Phone (Work)
- Company Postal Code
- Company State/Province
- Company Street Address
- Company Street Address 2
- Company Tags
- Company Time Zone
- Company Vertical
- Company WebSite
More contact information
- Job Title— helpful with multiple contacts under one company umbrella
- Levitate Note— can add a note en masse to a contact profile, or one by one. Can also be used when importing notes from another CRM.
- Website
Addresses, handwritten cards, and households
- Street Address
- Street Address 2— only one street address can be listed per contact, Street Address 2 serves the purpose of Apt. #, et. al.
- Address Name (for Handwritten Cards)— want to put a different name or salutation on a Handwritten Card envelope? Use this field to add that!
- City
- Postal Code
- State/Province
- Country
- Household Identifier— a household consists of two contacts, this identifier can be anything! As long as the two contacts have a matching identifier (i.e. Smith Family 2, or 123456) they will be paired under a household.
- Household Relationship— both of the members of the household will need to be identified with Spouse, Partner, Husband, Wife, Head, or Head of Household
- Remove Household— this will essentially remove the 'Household Identifier' from the contacts and dissolve the household connection
- Home City
- Home Country/Region
- Home Postal Code
- Home State
- Home Street
- Home Street 2
Advanced Options
- Additional ID— this will allow for contacts that have the same email address to not be automatically merged in Levitate, both contacts must have this Additional ID for this to work
- Bio— anything can be added here, and the information can be used as a {{merge field}} when sending out messages
- CreatorID— can be used to overwrite or assign who 'created' the contact
- LevitateID— this is a specific ID generated by Levitate
- OwnerID— can be used to overwrite or assign who 'owns' the contact
- Display Name
- Text Opt Out (also accepted as SMS Opt Out) — set to true or yes to mark the contact as opted out of text messages during import. Only available on accounts with texting enabled. Note: This is a one-way field — you can opt contacts out via import, but you cannot opt them back in via spreadsheet. To resubscribe contacts, use the bulk resubscribe action on the Contacts page.
Second Contacts
- Second Contact First Name
- Second Contact Last Name
- Second Contact Birthday— if creating a second contact, they must share the same email address with the primary contact, and in order for both birthdays to send correctly, all information must be included via spreadsheet import.
Reviews, renewals + policy identification, and other important dates
- Annual Review
- Renewal— renewal is a key fact and can be seen through the renewal dashboard card and used to set up renewal date based automations
- Policy
- Policy Carrier
- Closing Anniversary
Expert tips
E-mail addresses make life easier.
Levitate looks at the e-mail address when creating a new contact. This prevents contact duplication and ensures the contact's profile in Levitate is populated with the correct information.
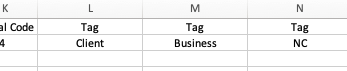
There are two ways to add tags in your spreadsheet.
-
You may have one column dedicated to all tags. Each client's row would have one cell with all of their tags separated by a comma.

-
You may choose to have multiple columns dedicated to a unique tag. Each client's row would have multiple cells with one tag per cell.


Step-by-step walk-through
- Click the Contacts link on the left-hand panel.
- Click the dropdown button beside New Contact and select Import from File.

- Choose to either (1) make your contacts visible to all employees or (2) keep your contacts visible only to yourself.

- Enter a Preferred Tag that will be applied to each contact that is imported.
- Click browse your files in blue and select your spreadsheet.
- Click the blue Next button.

- Choose the appropriate header in the dropdown above each column and click Import.
Why Your Import Count May Differ From Your Spreadsheet
After importing contacts, you may notice that Levitate shows fewer contacts than the number of rows in your spreadsheet. This is normal and typically happens for one of these reasons:
- Duplicate Email Addresses — If two or more rows in your spreadsheet contain the same email address, Levitate merges them into a single contact. This is the most common reason for differences in counts.
- Existing Contacts — If a contact with the same email address already exists in Levitate, the import updates that existing contact rather than creating a new one.
- Empty or Invalid Rows — Rows with missing required fields (like email address) or invalid data may be skipped during import.
- Header Row — Ensure your count excludes the header row of your spreadsheet.
How to Verify:
- Before importing, check your spreadsheet for duplicate email addresses
- After importing, search for a specific contact to confirm their information was imported correctly
- Review the import summary for any error messages
Row-level error detail
When a spreadsheet import encounters a problem with one or more rows — for example, a missing required field, an unrecognized date format, or a value that exceeds the field length — Levitate now surfaces a row-level error summary after the import completes. The summary identifies which rows were skipped and why, so you can correct just those rows and re-upload instead of hunting through the entire file. Rows that imported successfully are not affected.
Importing Contacts for Multiple Users
Each contact in Levitate is owned by a specific user. By default, every contact created through a spreadsheet import is assigned to the user who performs the import. If you need contacts to be split across multiple owners, run separate imports — one per user.
Multi-user import workflow
- Prepare a separate spreadsheet for each user, containing only that user's contacts and any tags specific to them.
- Have each user log in to Levitate under their own account.
- Each user runs their own import — the contacts in their file will be assigned to them as the owner. They can also apply a Preferred Tag during the import that gets attached to every contact they bring in, which is useful for distinguishing each user's batch.

Tag sync exclusions
If you don't want certain tags to sync from Levitate to your CRM, that's controlled in your integration settings rather than during the import. The import process always applies the tags as configured in the spreadsheet — whether they sync onward to your CRM is governed by the integration's tag exclusion list.
FAQs
Q: Can I import contacts for multiple users at once?
A: No — every import assigns the resulting contacts to the importing user as the owner. To split contacts across multiple owners, run a separate import under each user's account with that user's contacts.
Q: How do I exclude certain tags from syncing with my CRM?
A: Tag sync exclusions are configured in your integration settings, not during import. The spreadsheet import always applies tags exactly as configured; whether those tags propagate to your connected CRM is controlled per-integration.
Q: Why are fewer contacts showing as campaign recipients than I imported?
A: Several factors can reduce the recipient count shown when sending a campaign, even after a successful import. Common reasons include: contacts that were merged during import because they shared an email address with an existing contact; contacts whose email address was missing or left blank in the spreadsheet (Levitate excludes contacts without a valid email from email sends); contacts who previously unsubscribed from your emails (these are automatically excluded from campaigns); and contacts whose email address previously bounced (also excluded automatically). To investigate, open the import summary after your import completes and check for any rows that were skipped or merged. Then, on the individual contact's profile, verify that an email address is present and that the contact does not have an unsubscribed or bounced status.