Tags, Tag Categories, & Tag Logic
Tags are a grouping of contacts in Levitate that are utilized for segmentation.
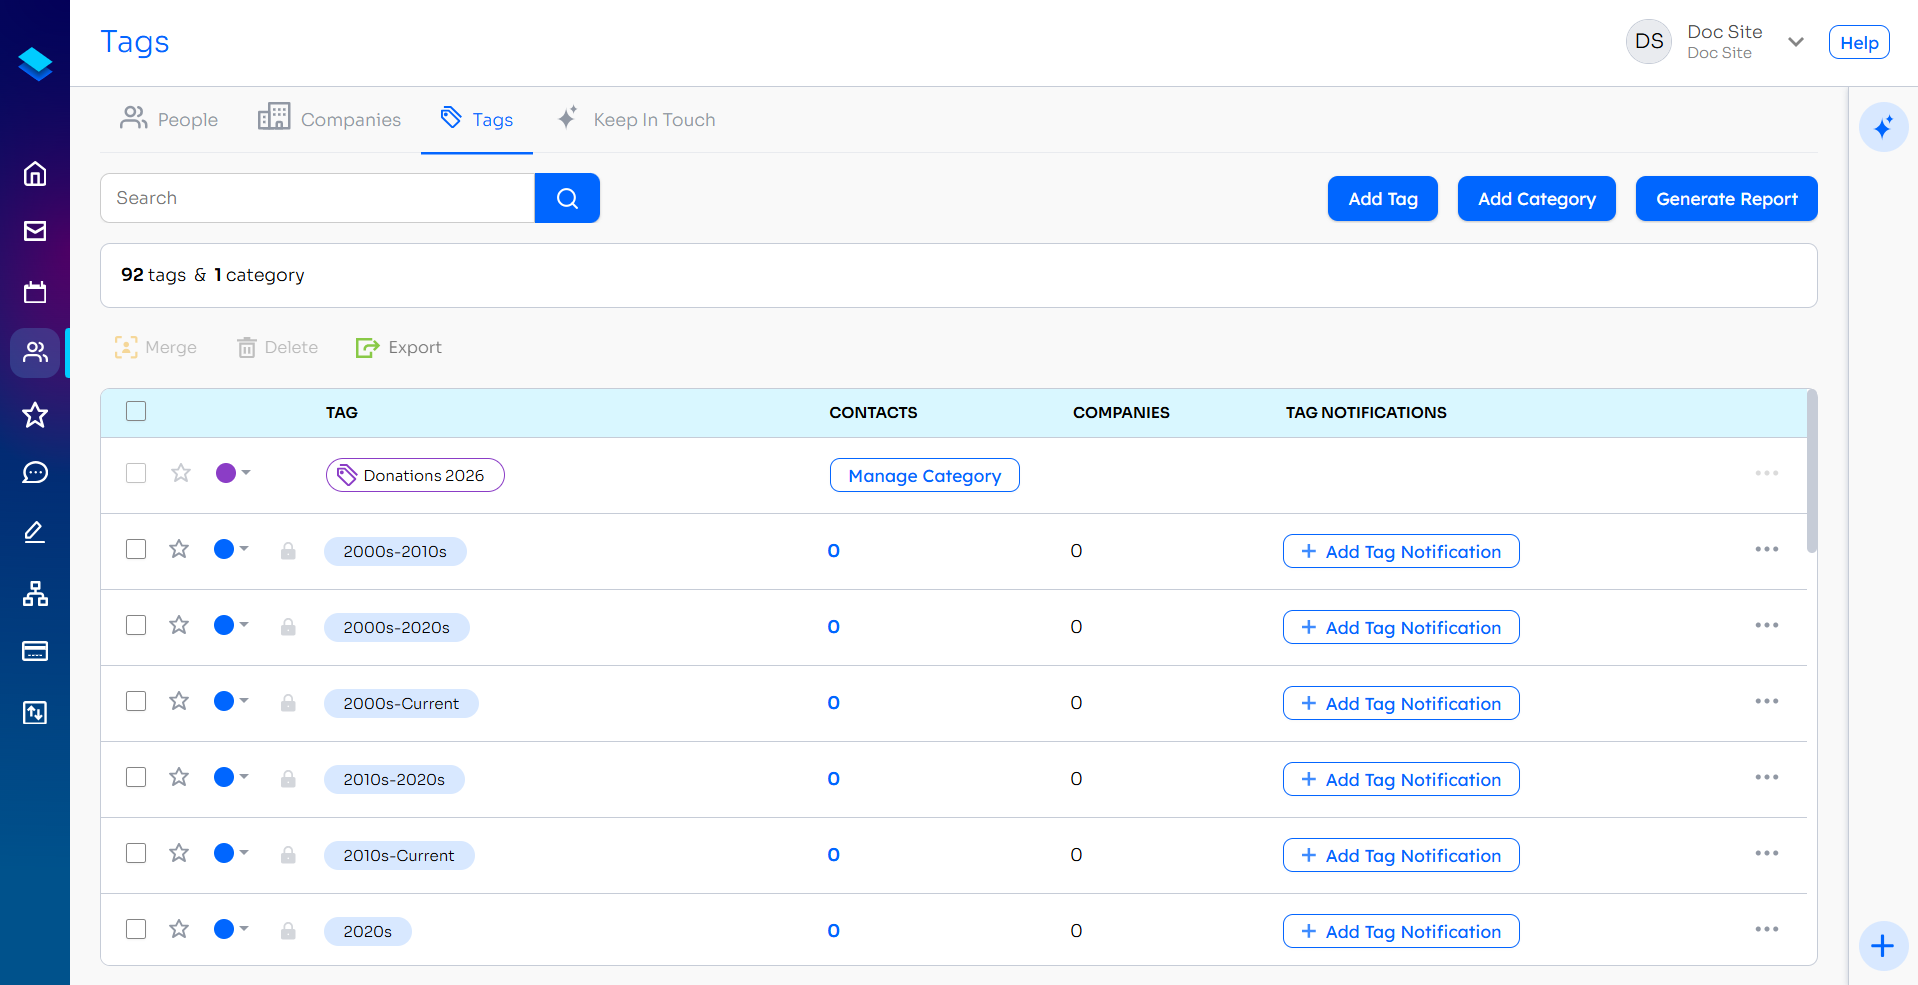
You can access a full list of tags for your account by going to Reporting from the left-hand navigation bar, and choosing Manage Tags. You can also access tags by going to Contacts and choosing the Tags tab.
Adding Color to tags
When you are on the list to manage tags, be it through Tags & Reports or Contacts, you're able to select a color for each and every tag created.

These tag colors can be updated at any time through your tag management pages!
What's a Tag Category?
Individual tags can be grouped together as a Tag Category for easier sorting and better compartmentalization.
Tags Categories can be manually created by selecting the tags you'd like to include in a category. Levitate also creates a Tag Category for each Opportunity Board by default to group all tags associated with that opportunity under one umbrella.
Tag Categories can also be assigned a color, just like Tags.
Tagging in Bulk
Option 1: Tagging in Levitate
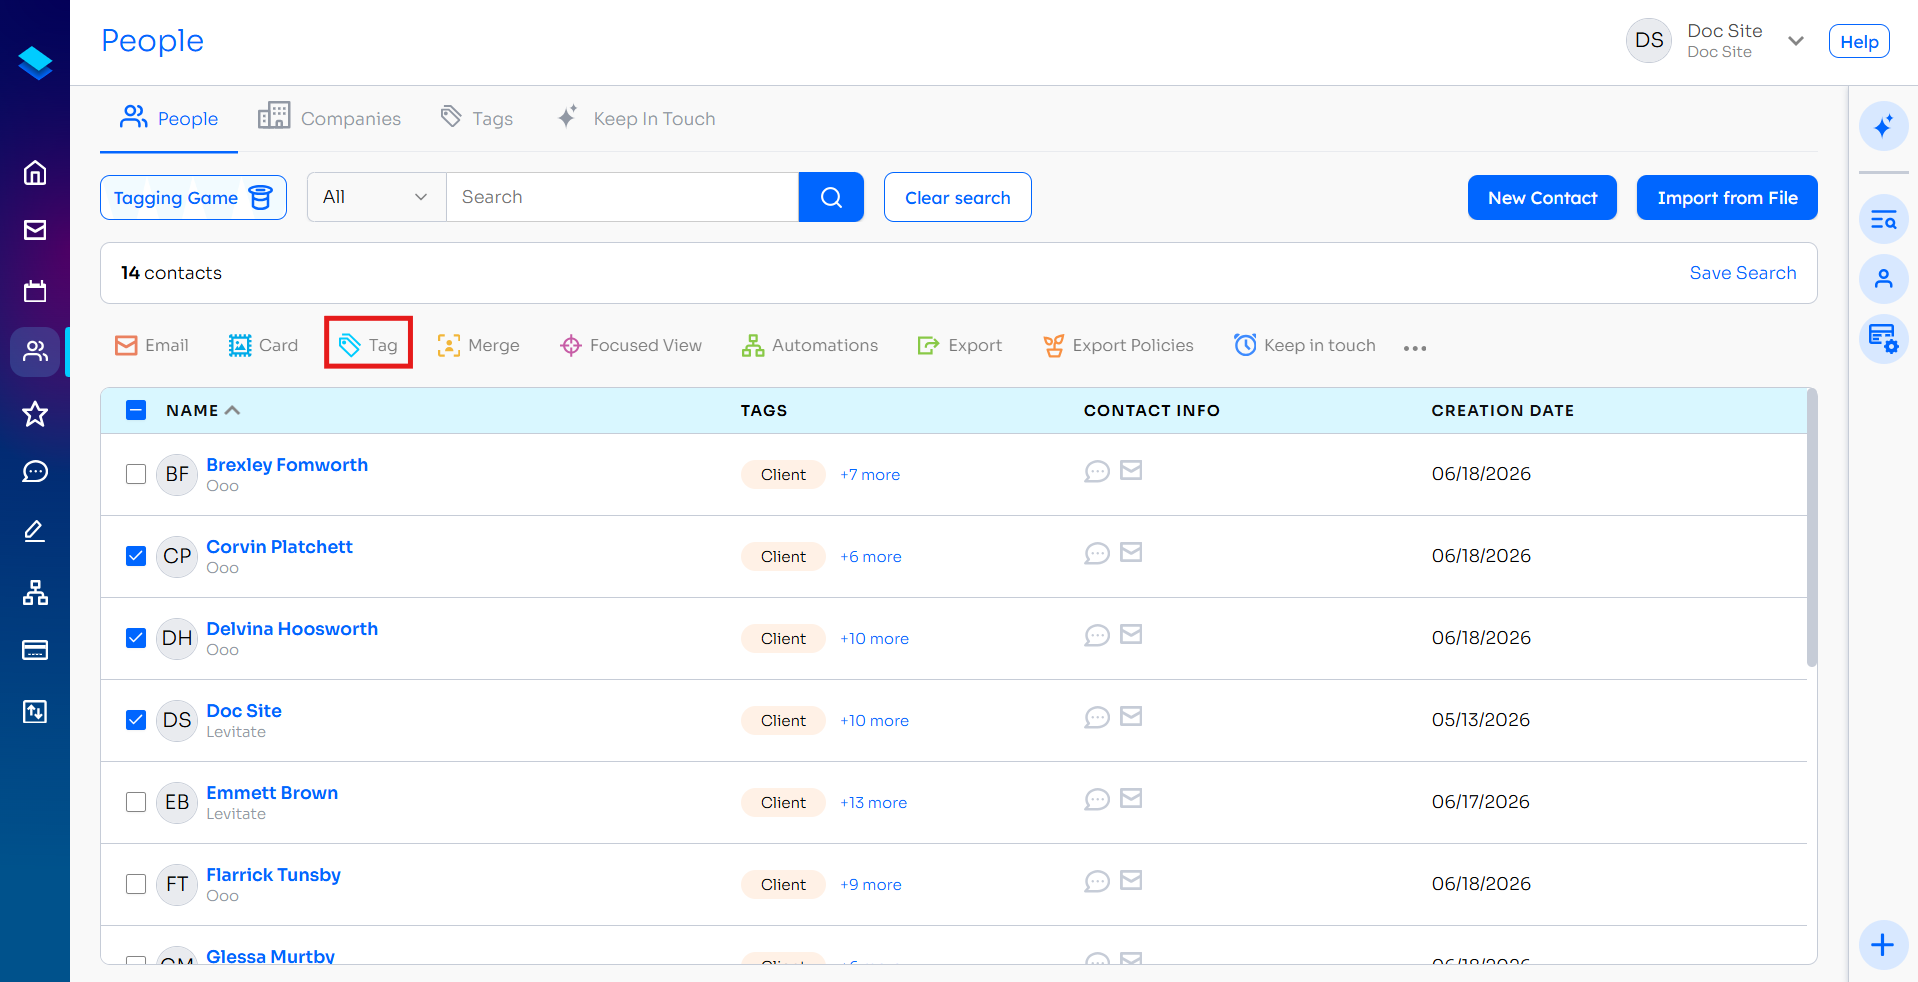
- Click the People tab in the left-hand navigation
- Using the check boxes to the left of their names, scroll through the list and select everyone you would like to tag.
- Click the 'Tag' button at the top and type in the name of the tag.
Option 2: Tag from a filter or selection
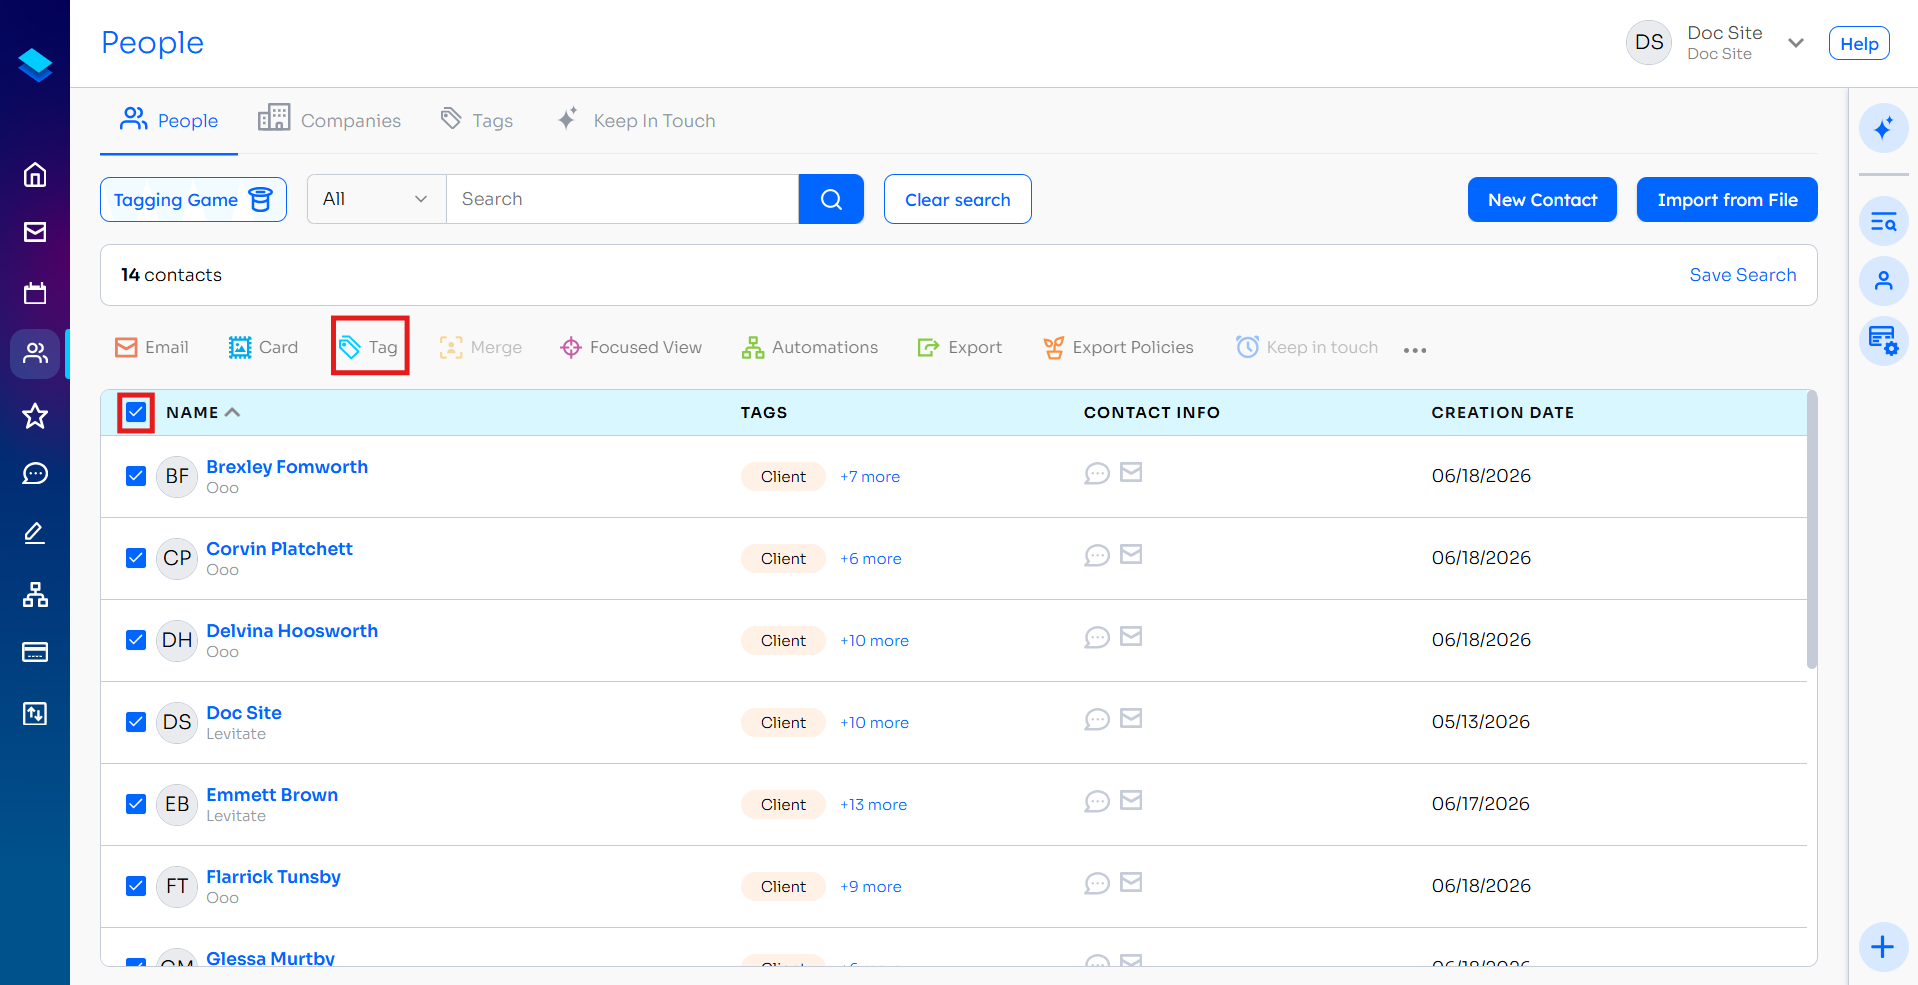
- Navigate to the Contacts page (People > Contacts)
- Use filters or search to find the contacts you want to tag
- Select multiple contacts using the checkbox selection (supports individual + "Select All")
- Click the "Tag" button in the actions bar
- In the modal, search for an existing tag or type a new tag name
- Click "Add" to apply the tag to all selected contacts
Tip: You can also use Smart Views to create a saved filter and then apply tags to the filtered group.
Note: If the tag you're applying has an automation linked to it, Levitate will prompt you to start the automation for the selected contacts.
Option 3: Tagging in a spreadsheet
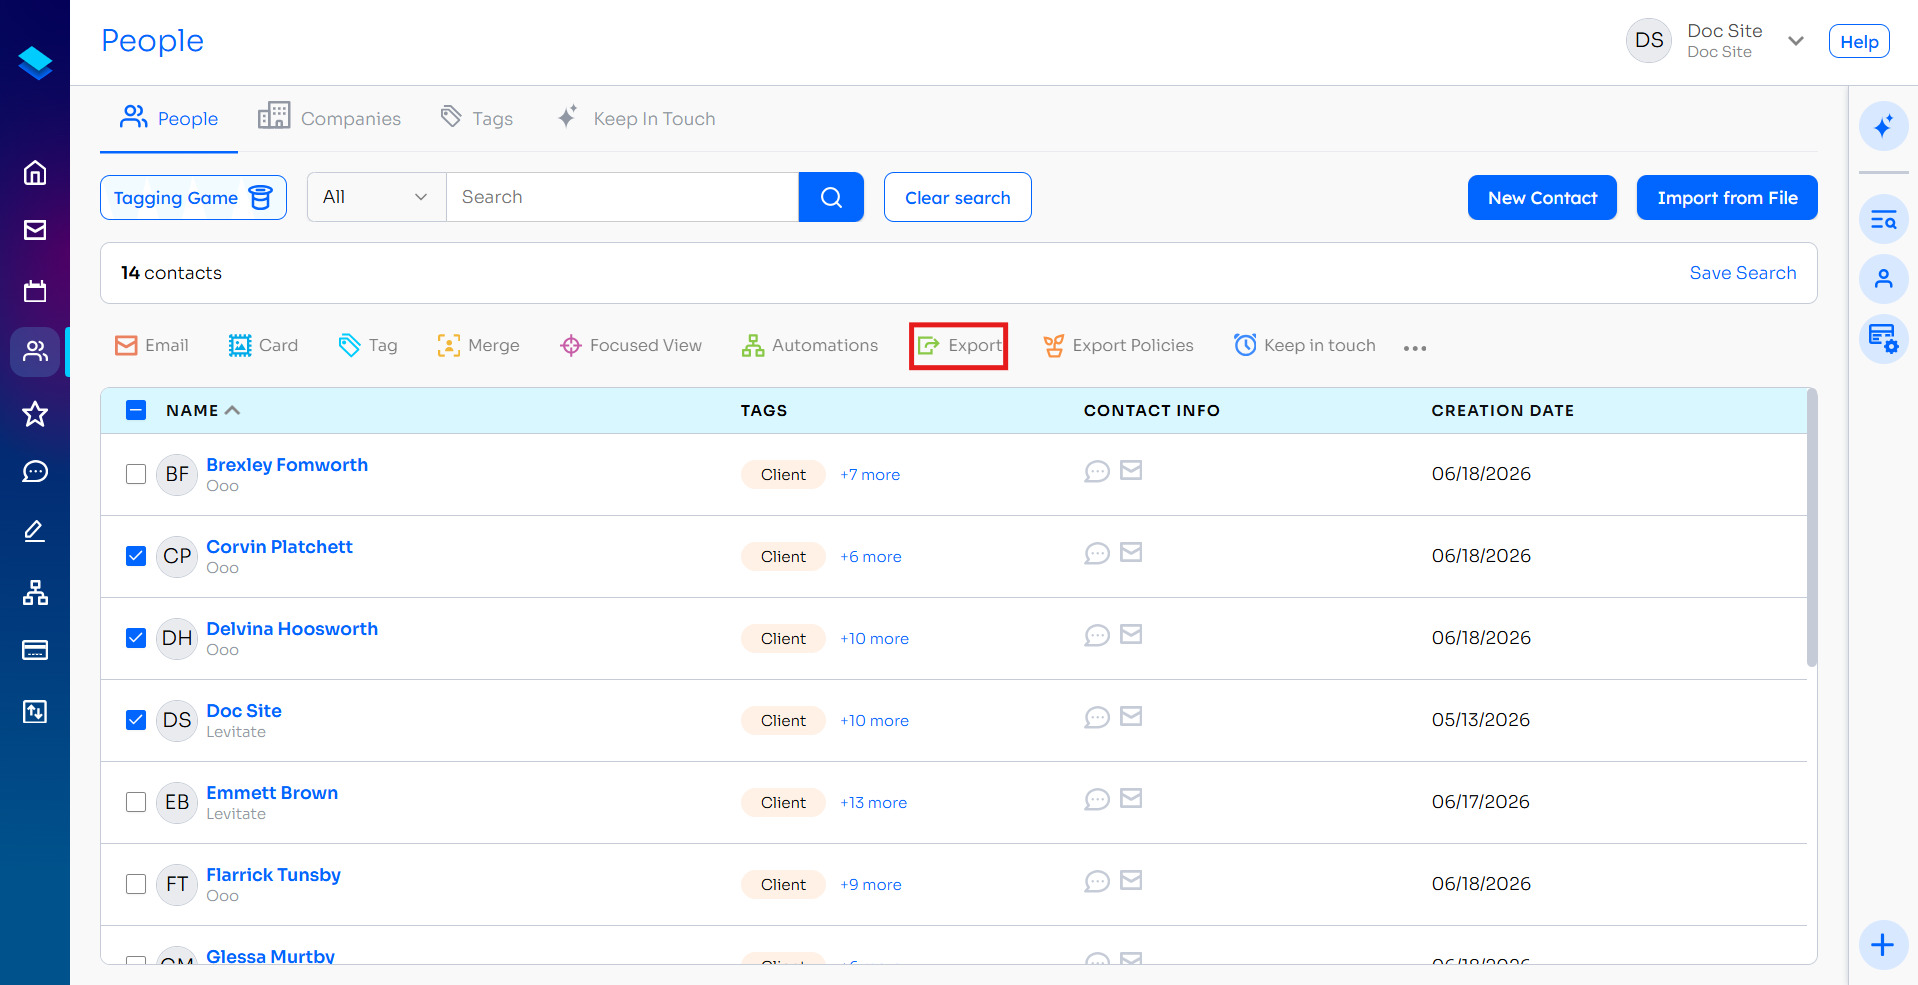
- Click the People tab in the left-hand navigation
- Select the 'All' check box
- Click the 'Export' button. This will download all Levitate contacts into a spreadsheet.
- Using the spreadsheet, add a column for tags. Note: multiple tags can be added when separated by commas.
- When you are finished tagging, send the spreadsheet to your Client Success Manager or support@levitateapp.com to be imported to your account.
Viewing Contact Counts Per Tag
There are two ways to check how many contacts are associated with a tag:
- Reporting > Manage Tags: Navigate to Reporting > Manage Tags to see a summary of all tags and their contact counts.
- Smart Views: Create a Smart View filtered by a specific tag to see the exact number of matching contacts.
Note: The contact count updates in real-time as contacts are added or removed from tags.
Filtering and Sorting Contacts by Tags
Finding Contacts by Tag Status
Method 1: Tagging Game
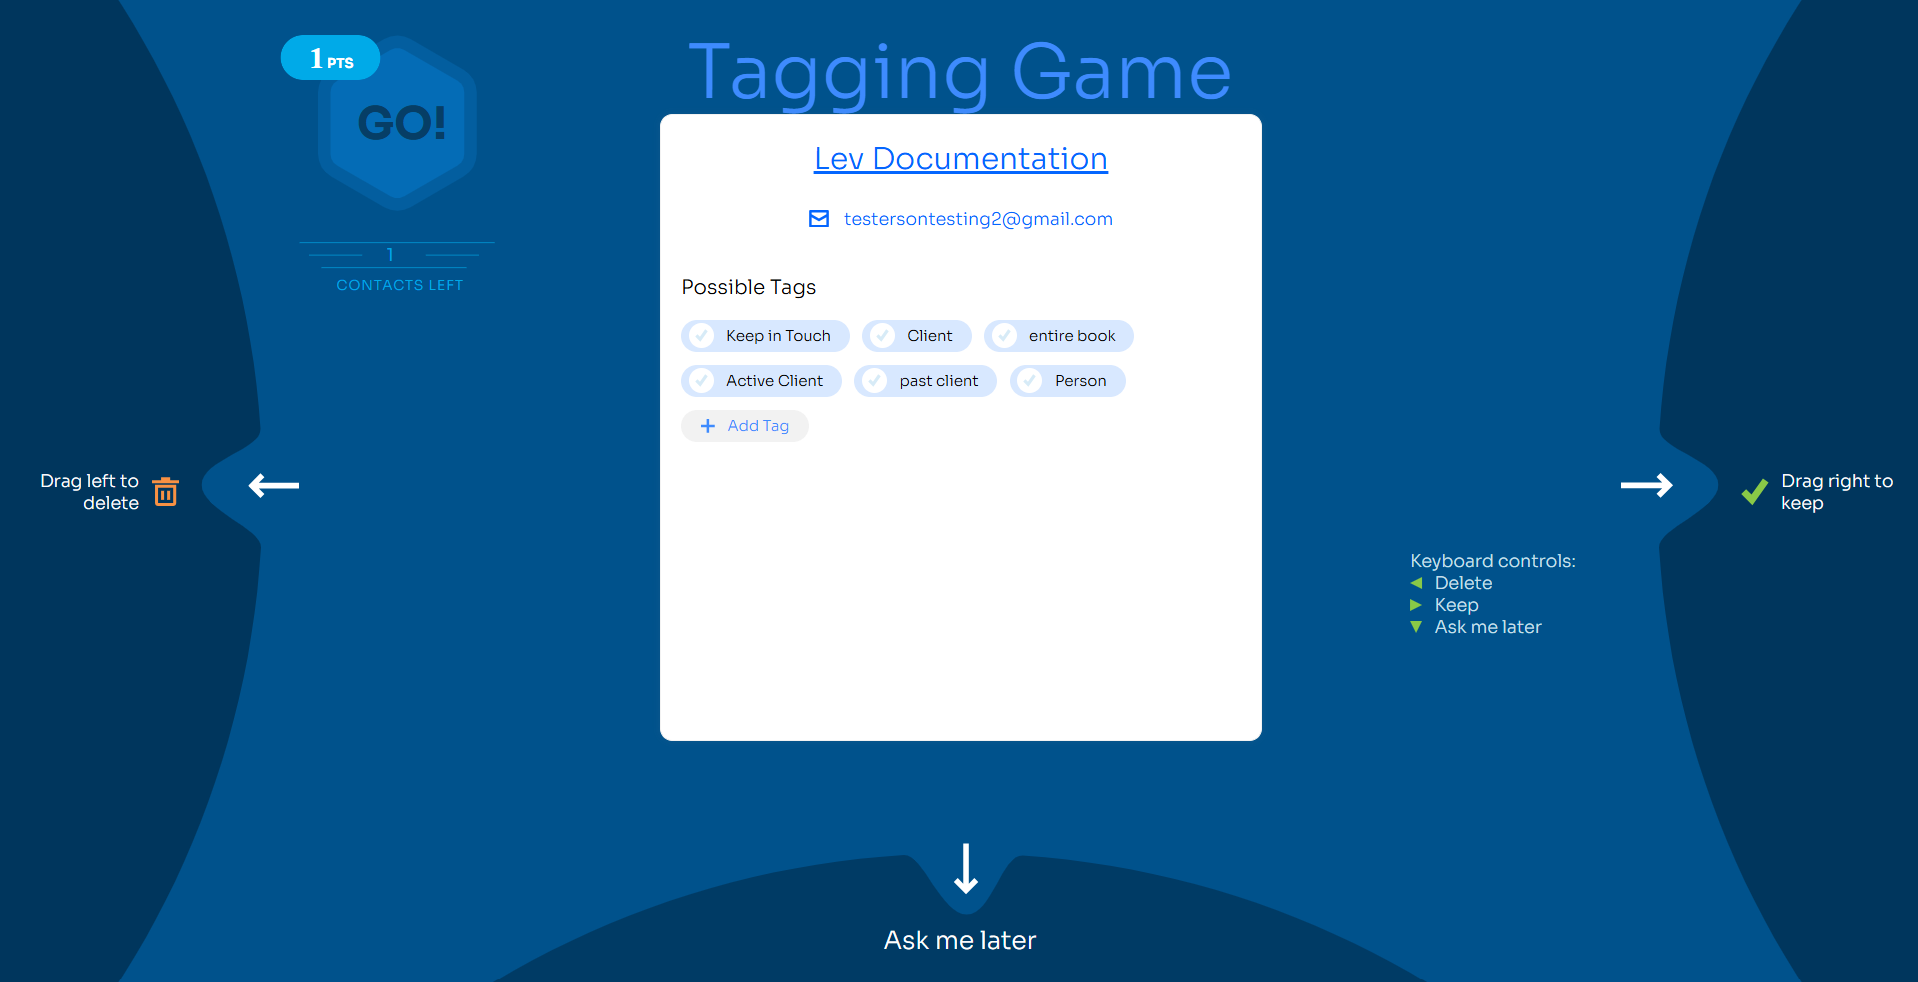
Use the Tagging Game to review and tag your untagged contacts.
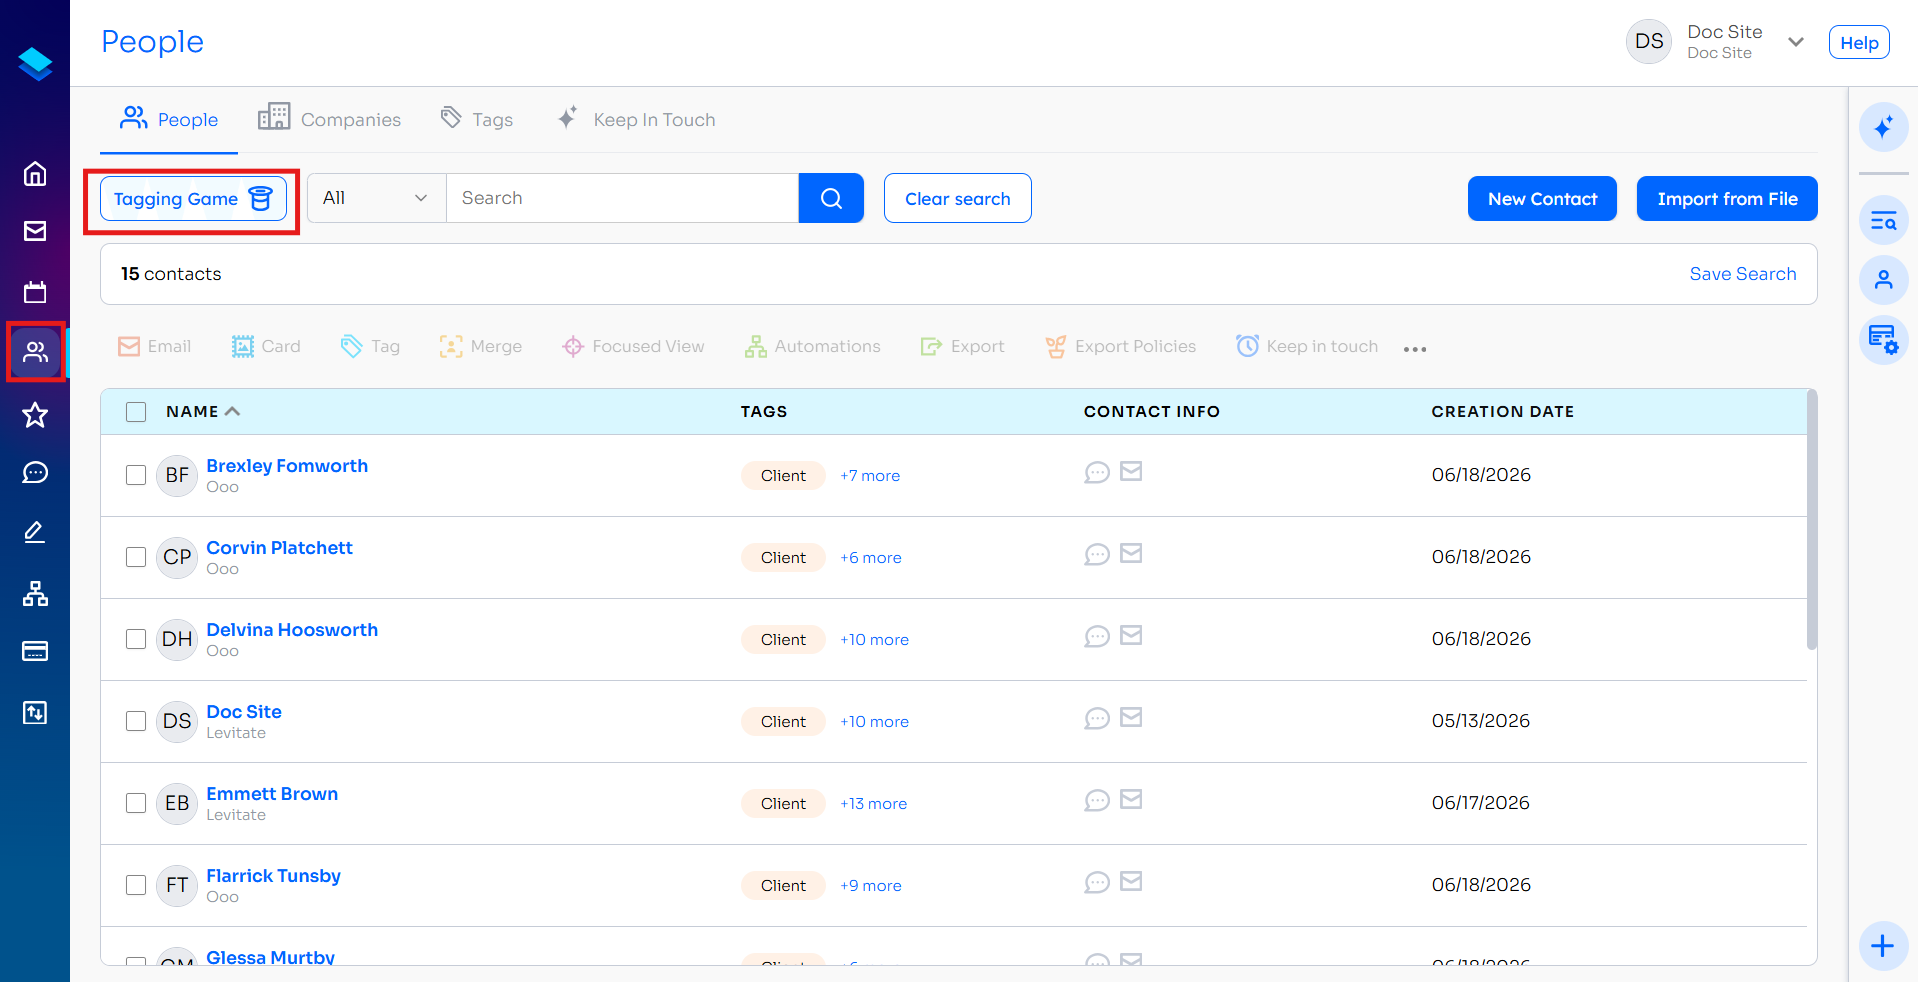
- Navigate to your Contacts page
- Click the "Tagging Game" button in the upper right
- Levitate will show you contacts without tags one at a time
- Add appropriate tags as you review each contact
- Click "Next" to continue through your untagged contacts
Method 2: Search and Filters
On the main Contacts page:
- Click the filter icon
- Select "Tags" from available filters
- Choose specific tags to filter by
- Use "Has all of these tags" or "Has any of these tags" logic
- Results update automatically

Sorting Your Contact List
Direct tag-sorting in the contact list isn't supported, but you can export and sort in a spreadsheet:
- Go to Contacts, select all, then Export
- Export contacts to CSV
- Open in Excel/Sheets
- Sort by the "Tags" column to group contacts by tag
- Identify contacts with missing or incomplete tags
Best Practices for Tag Management
Regular Maintenance:
- Schedule monthly "tagging sessions" using the Tagging Game
- Create Smart Views to monitor tag coverage
- Set up automations to add tags based on contact activity
Tag Hygiene:
- Use consistent tag naming conventions
- Avoid creating duplicate tags with similar names
- Archive unused tags to keep your list clean
Team Coordination:
- Document tag meanings and usage guidelines for your team
- Create shared Smart Views for common filtering needs
Merging Tags
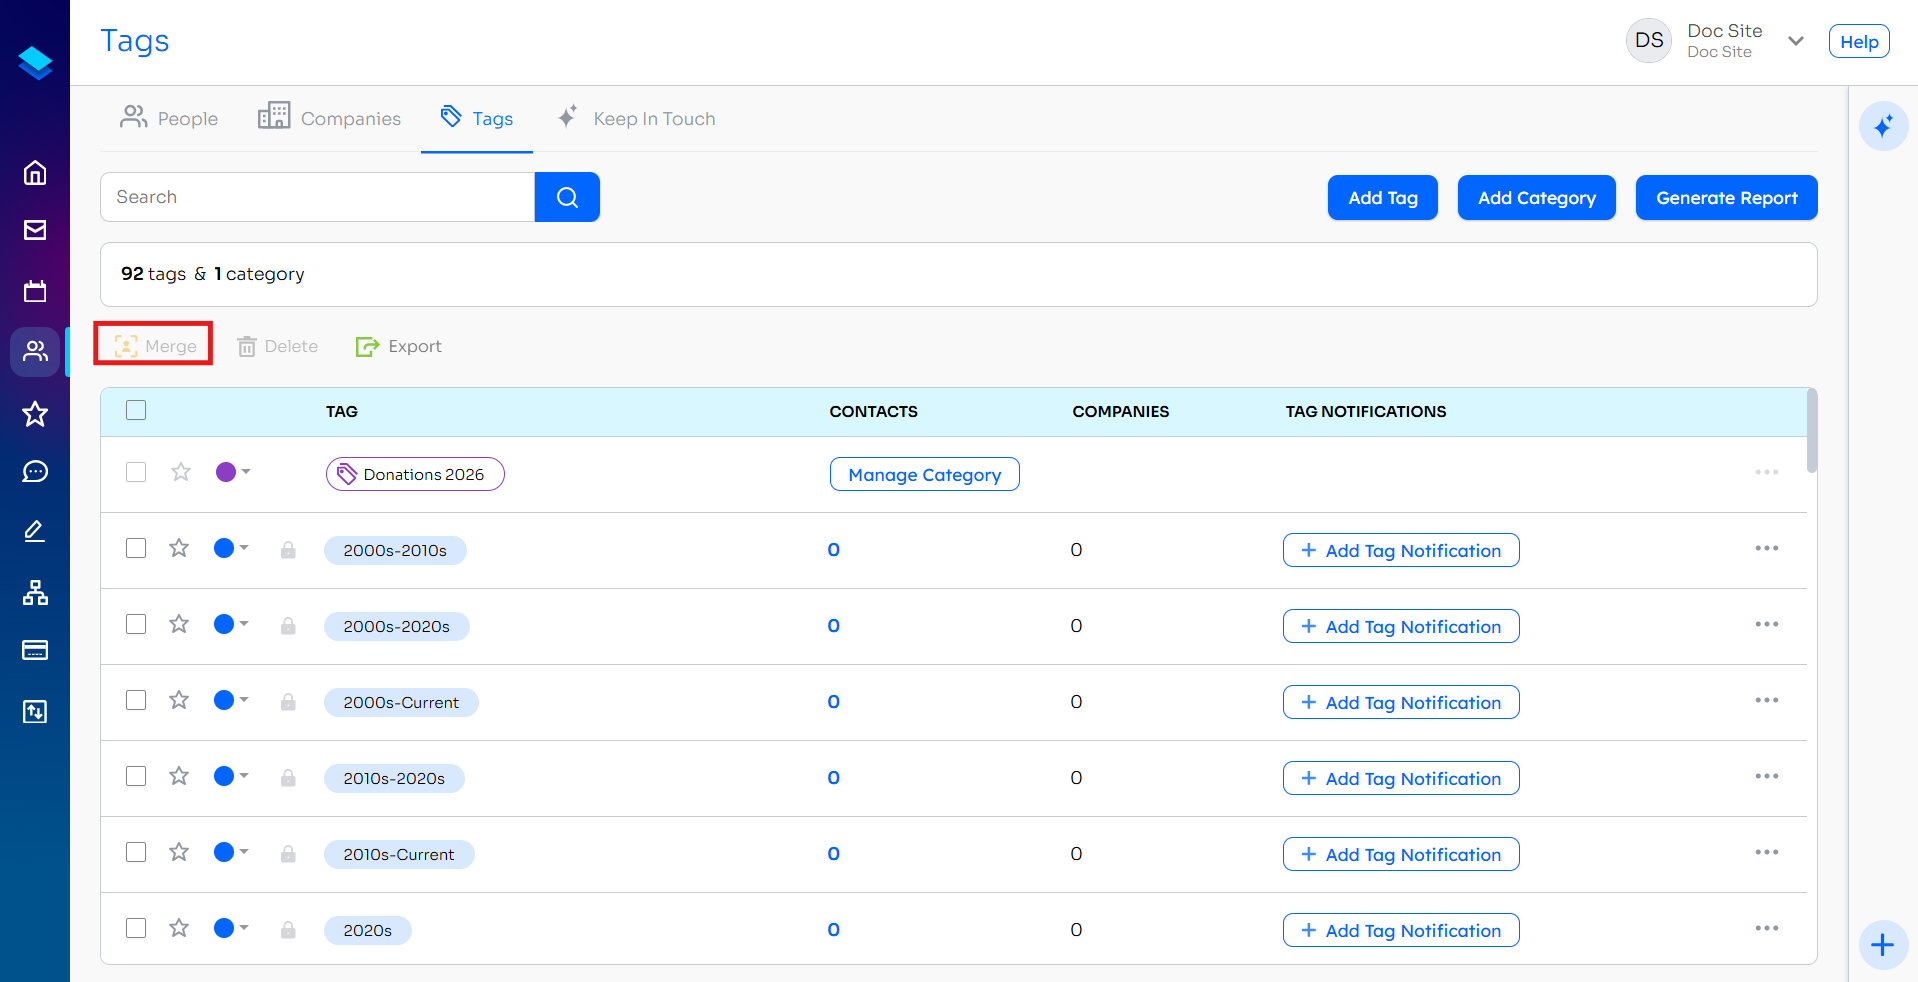
Starting from the Dashboard, you'll choose Reporting from the left-hand navigation menu and then choose Manage Tags.
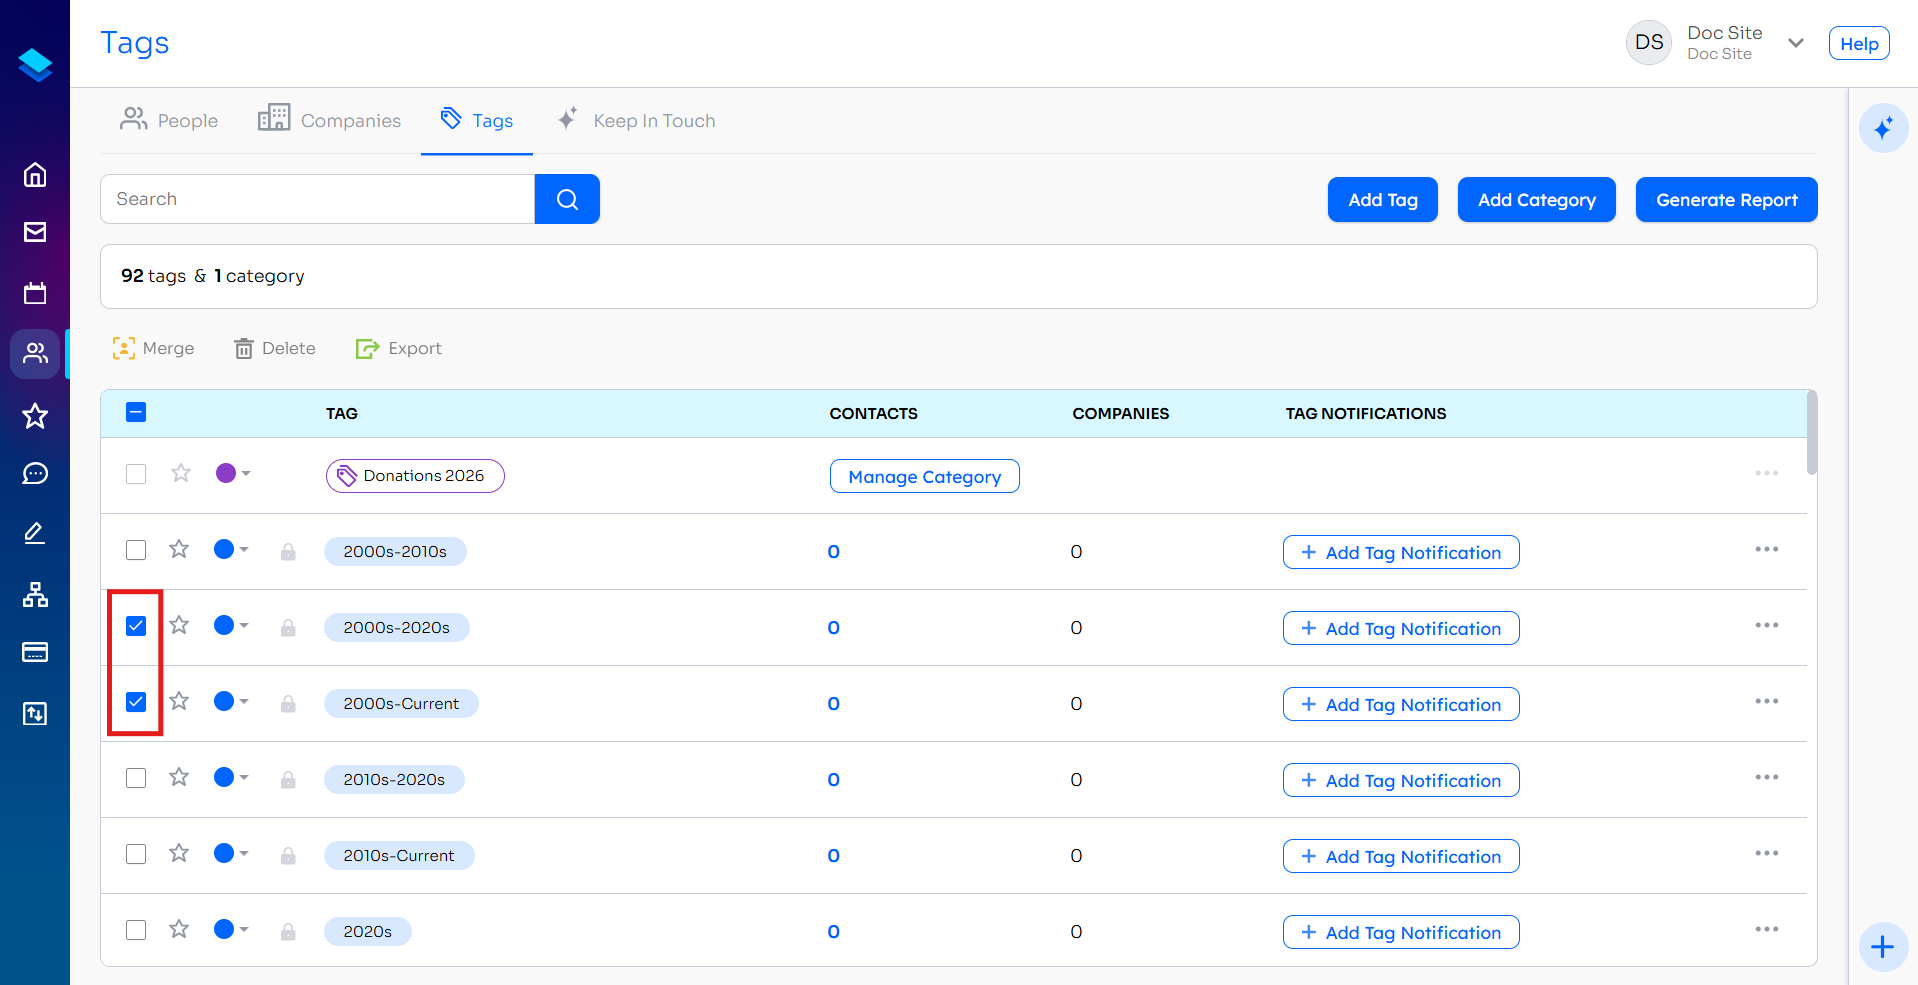
From there, you can search for the Tags to merge and click the checkbox on the left-hand side. Then, scroll down for the other Tag to merge with the first and check the box on the left-hand side.
At the top below the search bar click on Merge
Then select which tag you wish to represent both groups and click Merge.
Removing a Tag
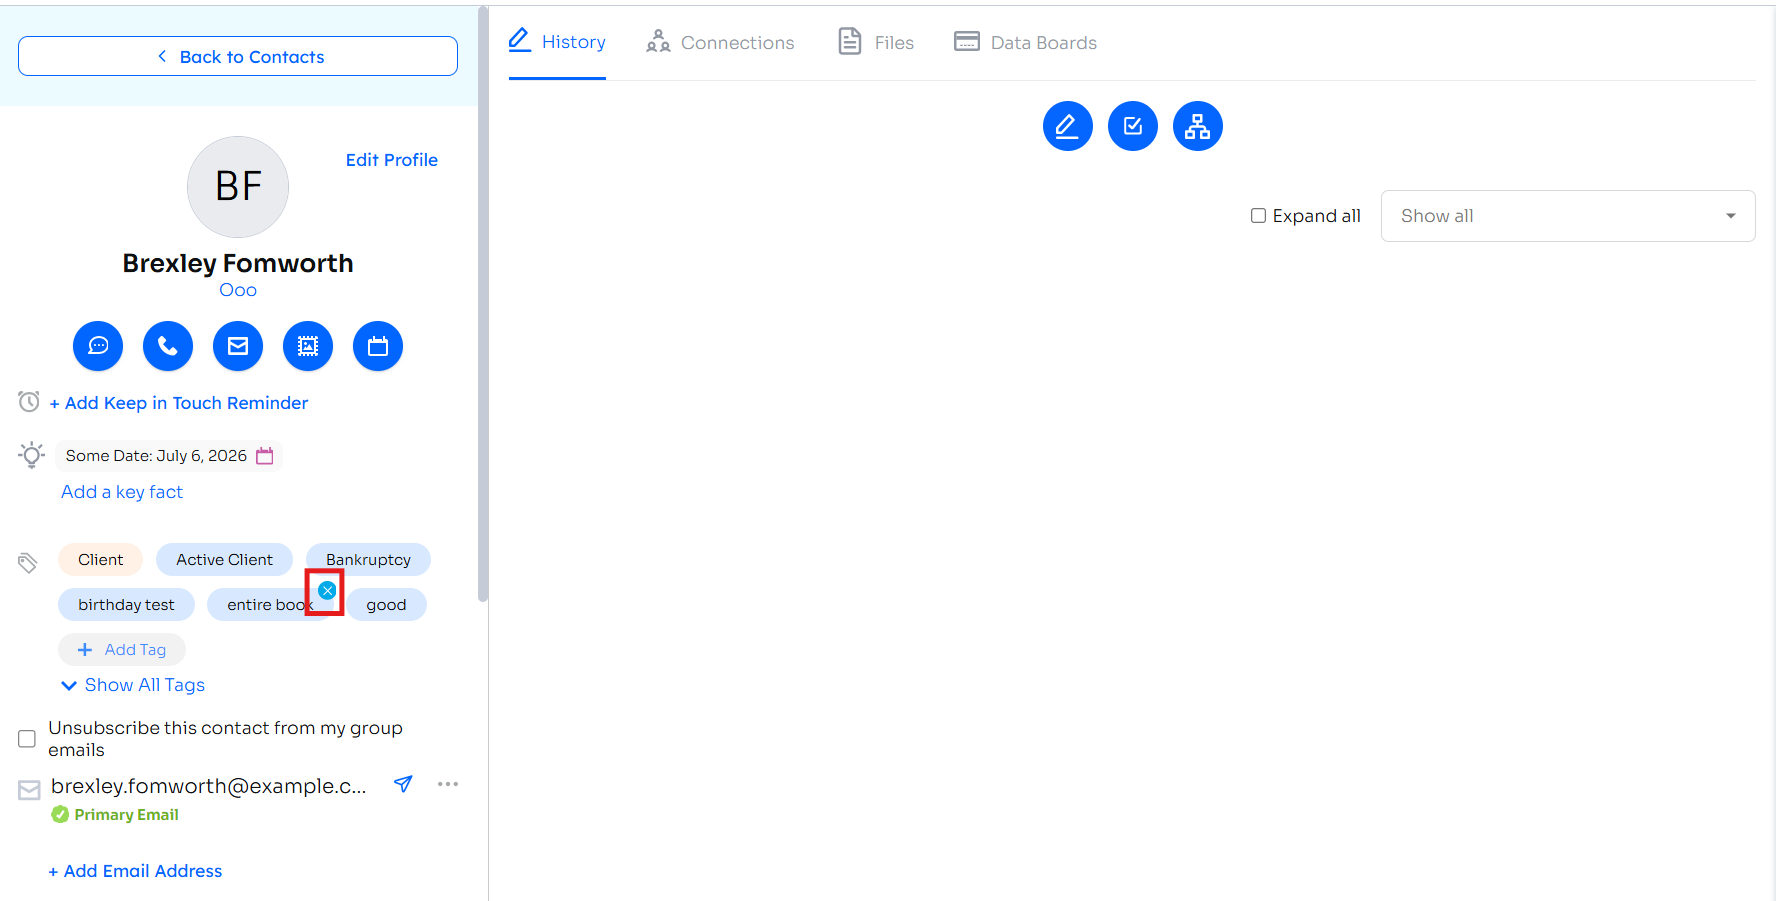
Removing a Tag from a contact
To remove a tag from a contact, simply hover over the tag on the profile and click on the X to remove the tag.
Removing a Tag from a group
To delete a tag from every contact it's applied to:
- Go to Reporting > Manage Tags.
- Search for the tag, select it, and click Delete.
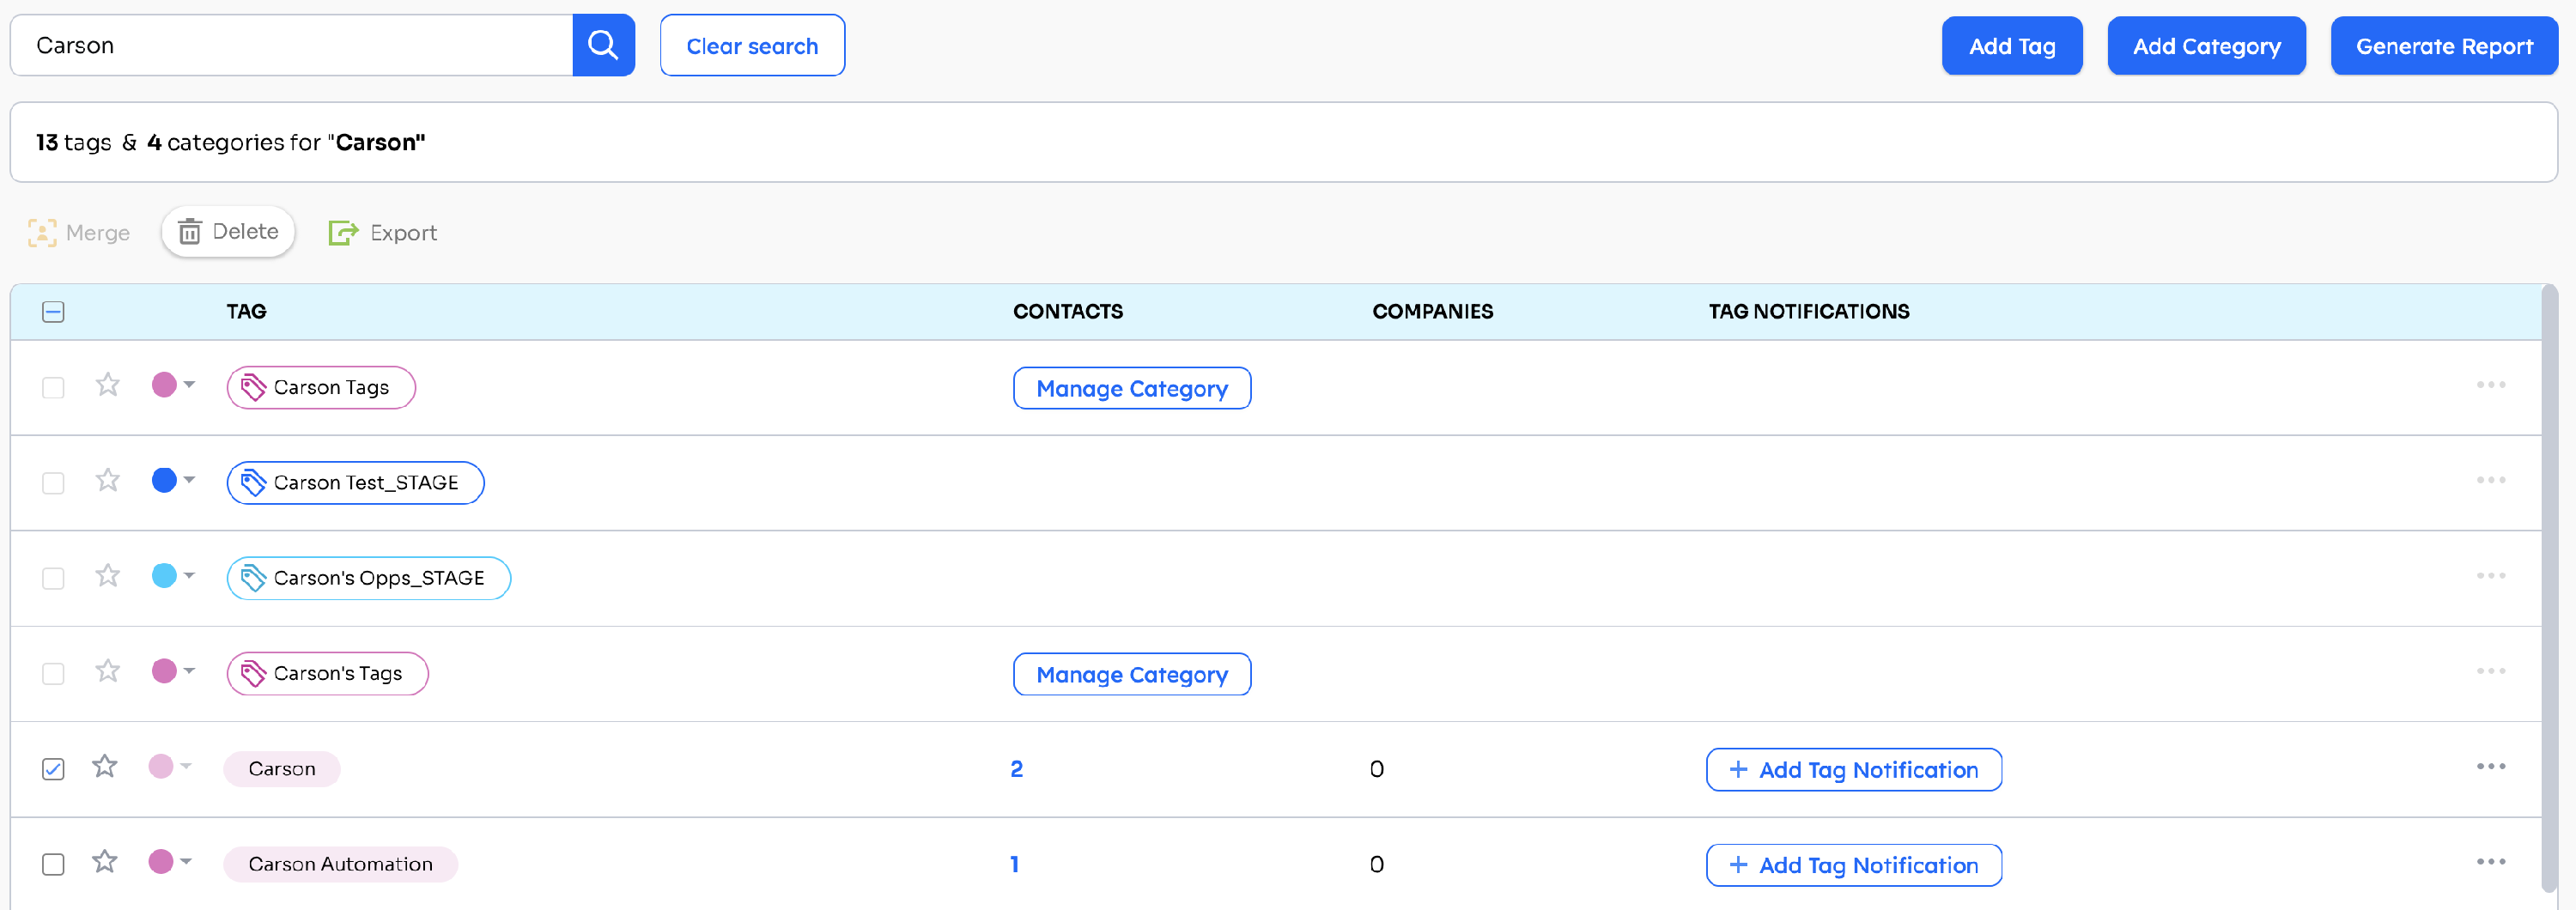

Note: Only Administrators and Super Administrators can delete tags. Other users can open Manage Tags but will see an error if they try to delete.
Tag Logic
Tag Logic lets you narrow a recipient list to specific contacts within a tag group — or widen it by combining two or more tags.

"AND [also contains the tag...]"
"OR [contains the tag...]"
"but EXCLUDE [contacts that have...]"
Tag A and Tag B


Tag A or Tag B


Tag A exclude Tag B


Tag A and Tag B exclude Tag C


Tag A or Tag B exclude Tag C


Tag Logic for Companies
The same AND, OR, and EXCLUDE tag logic described above is also available on the Companies tab. When building a recipient list or filtering from the Companies view, you can combine and exclude tags using identical controls — select a primary company tag, then add AND, OR, or EXCLUDE conditions to narrow or broaden the group exactly as you would for contacts.
Imported On Tags
If you upload contacts to Levitate via a spreadsheet, each contact per upload will be tagged with "Imported On: Date." This can be useful for tracking when a contact was added, but if you are updating or removing information through spreadsheets, they can become moot. If you do not want these tags included on your contacts' profiles, they can be deleted en masse via Reporting > Manage Tags.
FAQs
Filtering and Sorting
Q: Can I filter for contacts with NO tags at all?
A: Yes, use the Tagging Game which automatically shows untagged contacts, or create a Smart View with "Does not have tag" filters for your most common tags.
Q: How do I find contacts missing a specific tag?
A: Create a Smart View with the filter "Does not have tag: [Tag Name]". This will show all contacts without that specific tag.
Q: Can I sort my contact list alphabetically by tag name?
A: Direct sorting by tag isn't available in the main contact view, but you can create separate Smart Views for each tag to organize contacts, or export to CSV and sort in a spreadsheet.
Q: What's the difference between "Has all of these tags" and "Has any of these tags"?
A: "Has all" shows contacts that have EVERY tag you selected (AND logic). "Has any" shows contacts with AT LEAST ONE of the selected tags (OR logic).
Q: Can I see which tags are used most/least frequently?
A: While there's no built-in tag usage report, you can create Smart Views for each tag to see contact counts, or export your contacts to analyze tag distribution in a spreadsheet.
Q: How do I bulk-add tags to contacts missing them?
A: Use the Tagging Game for individual review, or create a Smart View to identify the contacts, select them, and use bulk actions to add tags to multiple contacts at once.
Email Bounced & Unsubscribe Tags
Q: What does the "Email Bounced" tag mean?
A: The Email Bounced tag indicates that an email sent to a contact could not be delivered. This typically applies to hard bounces, where the issue is permanent.
Q: What's the difference between a hard bounce and a soft bounce?
A:
- Hard Bounce: This means the email could not be delivered because the address is invalid or the mailbox does not exist. This is considered a permanent issue.
- Soft Bounce: This is a temporary delivery issue. Common reasons include:
- The recipient's mailbox is full
- The recipient's email server is temporarily unavailable
- A short-term deliverability issue
Q: Does Levitate tag contacts for both types of bounces?
A: No. Levitate only applies the Email Bounced tag for hard bounces, where the email address is confirmed to be invalid.
Q: Why aren't soft bounces tagged?
A: Soft bounces are often temporary and may resolve on their own. Since the issue isn't permanent, Levitate does not add the Email Bounced tag to avoid incorrectly flagging valid contacts.
Q: What should I do if a contact has an Email Bounced tag?
A: If a contact has this tag, it's a good idea to:
- Verify the email address for accuracy
- Reach out through another method to update their contact information
- Remove or update the email before sending future campaigns
Q: Can a soft bounce turn into a hard bounce?
A: In some cases, repeated soft bounces may indicate a larger issue, but they are not automatically treated as hard bounces. Monitoring engagement and delivery over time can help you decide if an email address needs to be updated.
Q: Are Email Bounced and Unsubscribe contacts excluded from email sends?
A: Yes. All email sends automatically exclude contacts with the Email Bounced or Unsubscribe tags. This is why the recipient count on an email send may be lower than the contact count shown on the Contacts page for the same tag group.
Excluding Contacts by Tag from a Campaign
Q: How do I exclude contacts who already have a specific policy type tag from receiving a campaign?
A: Use the "but EXCLUDE" option in Tag Logic when setting up your campaign send. After selecting your primary recipient tag, click Advanced Filters in the Recipients panel, then check Exclude these tags... and add the policy type tag you want to suppress. Levitate will remove any contact carrying that tag from the send, regardless of what other tags they have.
Q: Where do I find the tag exclusion option during campaign setup?
A: When composing a campaign from the Campaigns tab or the People page, look for the Advanced Filters link at the top of the Recipients panel. Inside that flyout you will see a Narrow the list section. Check Exclude these tags... and search for the tag you want to exclude — for example, a policy type tag such as "Auto" or "Home." Contacts with that tag will be removed from the recipient list before the campaign sends.
Note: The tag exclusion option works alongside the OR/AND tag logic described in the Tag Logic section above. You can combine an included tag group with one or more excluded tags in a single send — for example, send to everyone tagged "Renewal" but exclude anyone already tagged "Life."